Key takeaways
- Cable length. Under 150 mm and routing becomes tight in wide cases; over 300 mm and signal integrity risk rises. The 200–300 mm band covers most builds.
- Connector angle. A 90-degree connector is near-universal, but the direction of the bend (up, down, or sideways) must match your slot orientation or the cable will foul the motherboard’s VRM heatsink.
Best Vertical GPU Mounts: Quick Answer
The best vertical GPU mount for most builds in 2026 is a PCIe 4.0 x16 riser kit with a metal-reinforced bracket and a 200 mm or longer cable, matched to a case that leaves at least 40 mm of clearance between the card’s fans and the side glass. If your case doesn’t officially support vertical GPU mounting, a 90-degree adapter bracket plus a shielded riser is the practical workaround — but expect to lose 2–4 PCIe slots of access below the card.
Vertical mounting is not mainly an aesthetic upgrade. It exists to free the card from a cramped horizontal slot position, reduce sag on heavy coolers, and in some airflow layouts pull cooler air from the bottom intake rather than the front panel. The trade-offs are real: riser cables add a signal path, clearance shrinks fast, and a badly spaced vertical card can run hotter than the same card mounted normally.
Our top picks
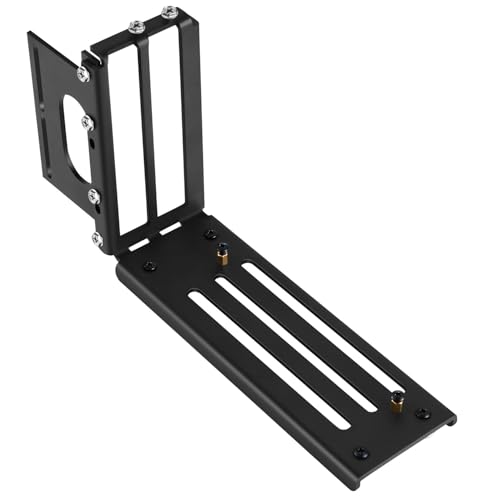
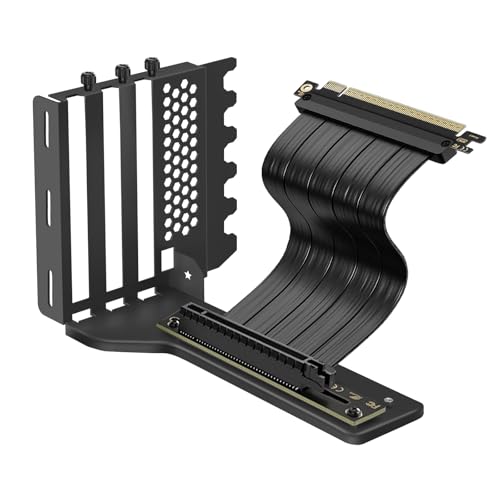

As an Amazon Associate we earn from qualifying purchases at no extra cost to you.
Quick Comparison: Vertical GPU Mount Options
| Pick | Best for | Key specs | Typical price range |
|---|---|---|---|
| Best overall: brand-name PCIe 4.0 x16 riser kit with steel bracket | Mid-to-full-tower cases with factory vertical slots | PCIe 4.0 x16, 200–300 mm cable, 90° connector, steel or aluminium frame, ~180–400 g bracket | $50–$90 |
| Best budget: basic PCIe 3.0 x16 riser bracket | Older GPUs, PCIe 3.0 motherboards, light builds | PCIe 3.0 x16, 150–200 mm cable, plastic or thin metal bracket | $20–$35 |
| Best for airflow: open-frame vertical mount with low bracket height | Mesh-front or mesh-side cases, triple-fan cards | Tool-free latch, 30–45 mm standoff from side panel, PCIe 4.0 x16 | $35–$70 |
| Best for small cases: angled 90° adapter with short cable | Micro-ATX and mini-ITX builds under 40 L | PCIe 4.0 x16, 100–150 mm cable, low-profile PCB, ~60 g | $30–$60 |
| Best for heavy cards: reinforced multi-point mount | Cards 2.5 slots or thicker, 1.8 kg+ | PCIe 4.0 x16, 300 mm cable, three attachment points, 400 g+ bracket | $70–$120 |
Why Riser Generation Still Matters in 2026
A riser cable is a short extension that carries PCIe lanes from the motherboard slot to a card mounted elsewhere. The single most common cause of vertical-mount problems is a PCIe 3.0 riser paired with a PCIe 4.0 or 5.0 motherboard and GPU. The system may fail to POST, drop to x8 lanes, or boot only after you manually force the slot to PCIe 3.0 in BIOS.
Per manufacturer spec sheets, PCIe 4.0 risers are typically rated for 16 GT/s per lane with tighter impedance control and thicker shielding than PCIe 3.0 units. PCIe 5.0 risers exist but carry a significant price premium and offer no measurable gaming benefit for current cards, which rarely saturate PCIe 4.0 x16 bandwidth. For most buyers, a certified PCIe 4.0 x16 riser is the correct standard in 2026.
Two more spec details worth checking before purchase:
- Cable length. Under 150 mm and routing becomes tight in wide cases; over 300 mm and signal integrity risk rises. The 200–300 mm band covers most builds.
- Connector angle. A 90-degree connector is near-universal, but the direction of the bend (up, down, or sideways) must match your slot orientation or the cable will foul the motherboard’s VRM heatsink.
Case Compatibility: The Numbers That Decide Fit
Vertical mounting only works if three dimensions agree. Measure before buying, because returns on opened riser kits are often restricted.
| Measurement | What it is | Target value | Failure symptom if wrong |
|---|---|---|---|
| Fan-to-glass gap | Distance from GPU fans to side panel | 40 mm minimum, 50–60 mm ideal | Fan turbulence, 5–12 °C higher GPU temps, loud whine |
| Card thickness | GPU slot width | 2–2.5 slots fits most mounts; 3+ slots needs a low-height bracket | Card contacts side panel or blocks bracket screws |
| Card length | PCB plus cooler shroud | Must be under case’s vertical clearance, usually 330–400 mm | Card collides with front radiator or drive cage |
| Bracket standoff height | How far the mount pushes the card off the motherboard plane | 25–45 mm | Too low starves airflow; too high blocks side panel |
Many cases list a “vertical GPU support” spec but mean only that the case includes a slot cutout, not a full bracket. Confirm whether the mount is included or sold separately — this is one of the most common purchase mistakes, and the standalone bracket often costs as much as the case’s vertical feature implies.
Airflow Reality: When Vertical Runs Cooler (and When It Doesn’t)
Vertical mounting changes which face of the GPU faces the intake air. In a case with a strong bottom intake and mesh side panel, a vertical card can pull cool air directly and run 2–5 °C cooler than horizontally mounted under a PSU shroud. In a solid-panel case with only front intake, the vertical card sits in a dead zone and can run 5–12 °C hotter.
A worked example makes the trade-off concrete. Suppose your card runs at 72 °C horizontally in a solid-panel case. Moving it vertical with only 15 mm of fan-to-glass gap typically pushes it to 80–84 °C, which forces higher fan RPM and roughly 10–15% more acoustic output at the same load. Add a 50 mm gap plus a bottom intake fan and the same card often lands at 68–71 °C. The mount isn’t the variable — the gap is.
Practical airflow rules that hold across most builds:
- Maintain at least 40 mm of fan-to-panel clearance; treat 25 mm as an absolute floor.
- Prefer mesh or vented side panels over tempered glass for vertical builds.
- Keep at least one bottom intake fan feeding the vertical card in towers 45 L or larger.
- Don’t stack a vertical card directly above a hot M.2 heatsink or chipset heatsink with under 20 mm of gap.
How to Install a Vertical GPU Mount: Steps and Reasons
A vertical GPU mount is a bracket-and-riser assembly that relocates the graphics card to a 90-degree position, connected to the motherboard slot by a flexible PCIe extension cable.
- Power down and remove the GPU. Release the slot latch before pulling; the latch is the single most common cause of damaged PCIe connectors.
- Install the bracket with the case on its side. Working horizontally prevents the bracket from dropping onto the motherboard and shorting contacts.
- Seat the riser in the motherboard slot first, then the GPU. The motherboard end is harder to reach once the card is attached, and a partial seat here causes most no-POST failures.
- Route the cable with a gentle arc, minimum 20 mm bend radius. Sharp folds damage the internal shielding and can degrade signal at PCIe 4.0 speeds.
- Confirm the GPU is fully latched in the riser’s slot. A vertical card can look seated while the latch is open; check both ends visually.
- Boot and verify link speed. Check the GPU’s PCIe link width and generation in the OS or BIOS. If it reports x8 or Gen 3 when both devices support Gen 4, reseat the riser or force the slot generation in BIOS.
- Run a 15-minute load test and watch temperatures. Compare against your horizontal baseline before you finalize cable management; if the delta exceeds 5 °C, adjust the standoff or add intake airflow.
Durability and Ownership: What Wears First
The riser cable is the wear item, not the bracket. Repeated insertions and removals stress the connector’s gold contacts and the cable’s strain relief, and a riser that has been bent sharply during installation can develop intermittent link errors months later. Budget for a replacement riser every few years if you rebuild often.
Typical long-term failure patterns and prevention:
- Intermittent black screens or link downgrades. Usually the riser connector or a cable damaged at a fold. Reseat first; replace if the symptom follows the cable.
- Bracket sag. Heavy cards on thin plastic brackets creep downward over 12–24 months. Steel or aluminium brackets rated for 1.8 kg+ cards avoid this.
- Dust loading. Vertical cards collect dust on the fan faces more visibly because they face the side panel. Clean every 3–6 months with compressed air while holding fans still to avoid bearing spin-up damage.
- Screw stripping. Tool-free latches and captive thumbscrews reduce the risk of stripping the soft metal threads common on budget brackets.
The most common installation mistake is buying the mount before measuring the fan-to-glass gap, then discovering the card runs hotter and louder than it did horizontally. The second most common is using a PCIe 3.0 riser on a PCIe 4.0 platform and blaming the GPU for boot failures.
Frequently Asked Questions
Does vertical GPU mounting hurt performance?
No, as long as the riser matches your platform’s PCIe generation. A properly seated PCIe 4.0 x16 riser delivers the same bandwidth as a direct slot connection, and gaming performance is identical within measurement noise. Performance issues trace back to a PCIe 3.0 riser on a PCIe 4.0 system, a partially seated connector, or thermal throttling from restricted airflow — not to vertical orientation itself.
Do I need a PCIe 4.0 riser or is 3.0 enough?
If your motherboard and GPU both support PCIe 4.0, use a PCIe 4.0 x16 riser. A PCIe 3.0 riser usually works but may force the system to run the slot at Gen 3, and some boards refuse to POST at all until you manually set the slot generation in BIOS. For PCIe 3.0 platforms or older cards, a 3.0 riser is fine and costs noticeably less.
How much clearance does a vertical GPU need from the side panel?
Aim for 40 mm between the card’s fans and the side panel, with 50–60 mm preferred. Below 25 mm, fan turbulence and recirculated hot air can raise GPU temperatures by 5–12 °C and make the card noticeably louder. Mesh or vented side panels tolerate tighter gaps than solid tempered glass.
Can I vertically mount a GPU in a case without built-in vertical support?
Yes, using a standalone 90-degree adapter bracket and riser cable. These mounts typically attach to the case’s rear expansion slot area and may block two to four slots of access below the card. Check that the bracket’s mounting holes align with your case’s slot spacing — standard ATX slot pitch is 20.32 mm, and most universal brackets follow it.
Will a 3-slot GPU fit a vertical mount?
Usually not in a standard vertical position. A 3-slot card needs a low-profile bracket with a reduced standoff, and even then it often contacts the side panel in cases under 200 mm wide. Measure your card’s thickness and your case’s interior width before buying; 2 to 2.5 slots is the practical limit for most mounts.
How long do riser cables last?
A quality PCIe 4.0 riser typically lasts several years with normal use, but connectors and strain relief degrade faster with repeated teardowns. If you rebuild your system more than once a year, expect to replace the riser every two to three years. Intermittent link errors, black screens at boot, or a reported link downgrade are the usual first signs.