Key takeaways
- A tripod only makes photos sharper when it is set up on solid ground, loaded below its limits and used with the camera's stabilization and shutter.
A tripod only makes photos sharper when it is set up on solid ground, loaded below its limits and used with the camera’s stabilization and shutter settings adjusted for it. Most blur from a tripod comes from small, avoidable habits such as an extended center column, a loose head or a finger pressing the shutter button.
If you have ever mounted a camera on three legs and still come home with soft frames, this guide is for you. It covers setting up the legs, balancing the camera, settling vibration and choosing camera settings that work with the support rather than against it, so your 2026 landscape, night and product shots start sharp at the source.
Start With a Stable Foundation
A tripod is only as steady as the surface under it. On pavement or a wooden floor, the legs grip well. On soft grass, sand or a bouncy deck, they can shift or sink, adding tiny movement during a long exposure. When you cannot avoid soft ground, spread the legs wider, press each foot firmly into the surface and check the platform again after a minute, because it may keep settling.
Level matters as well. Most tripods have a bubble level or adjustable legs to even the platform. Adjust each leg separately instead of tilting the whole unit, since a tilted base puts stress on the head and can make the camera drift under its own weight.
Set Up the Legs the Right Way
Extend the thick sections first
Leg sections get thinner as they extend, and thin sections flex more. Use the upper, thicker segments before the lower ones, and extend only as many sections as you need. A shorter tripod is a steadier tripod. If you have to raise the camera to eye level, bend your knees to look through a shorter setup instead of cranking up the last thin sections.
Keep the center column down
A raised center column works like a lever, so wind and tiny vibrations show up at the top. Lower it and use the legs for height. If the column must go up, keep it as low as you can and avoid hanging a heavy bag from a fully extended post. For the sharpest results, think of the column as a last resort for small adjustments.
Spread the legs and use the lowest angle you can
Wide leg angles give a lower center of gravity and resist wind. If the tripod has locking angle positions, use them. Point one leg toward your subject so that you can stand between the other two without kicking a foot. Check every leg lock, because a slipping section is a common cause of a slow sag during a long exposure.
Add weight when conditions are windy
Many tripods have a hook under the center column. Hanging a camera bag there can add stability, provided the bag does not swing. Tie it tight or hold it low to the ground. If a bag is not available, a few stones in a pouch will do. Never rely on weight to cover for a flimsy setup.
Mount and Balance the Camera
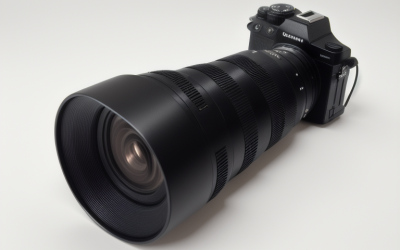
Attach the plate or quick-release clamp firmly, and check that the camera cannot twist on its mounting screw. A loose plate is a hidden source of blur, and a small coin or a plate with an anti-twist pin often helps. When using a long lens, mount the lens collar to the tripod rather than the camera body, because a heavy lens can strain the sensor-side mount and cause slow sag.
Balance matters as much as strength. Loosen the head, let the camera tilt gently and see where it wants to go. If it flops forward, slide the plate or shift the lens collar until it stays level when you let go. A balanced camera needs less clamping force, which means less vibration when you tighten the head and fewer surprises when a gust of wind arrives.
Camera Settings That Work With a Tripod
Use a low ISO, because you no longer need speed to freeze your own shake. A base ISO gives the cleanest files. Pick the aperture that suits your subject, often a middle value for a sharper lens. Then let the shutter speed fall wherever it needs to; the tripod lets you use slower speeds with confidence.
Turn off stabilization on cameras or lenses where the manual suggests it, as the system can introduce its own tiny motion when it has nothing to correct. If your camera has a mirror, use mirror lock-up or an electronic first-curtain shutter. Switch to manual focus or use live view to zoom in on your subject and focus carefully, because autofocus can be less reliable in dim scenes.
Trigger the Shutter Without Shaking Anything
Your finger pressing the button is a surprising source of vibration. Use a remote release, a wireless app or the self-timer instead. A two-second delay is long enough for any movement to die away, and a ten-second delay is better when the scene or setup is wobbly. After tripping the shutter, step back and keep your hands off the camera and tripod until the exposure ends.
Special Situations Worth Planning For
Wind is the most common enemy outdoors. Face one leg into the breeze, keep the setup low and shield the camera with your body when you can. For waterfalls and night skies, where exposures last several seconds or minutes, check the frame after the first shot and adjust, because a small shift can ruin an entire sequence.
Indoors, floors can carry vibration from footsteps. Wait until people stop moving around, or choose a solid floor over a hollow one. For close-up and product work, even a gentle touch on the table can shake the frame, so use a timer and let the scene settle before you press the button. When you move the tripod between shots, relock every leg and recheck the level before you shoot again.
Common Tripod Problems and Fixes
| Symptom | Likely cause | What to do |
|---|---|---|
| Slightly soft across the frame | Vibration from the shutter or your hand | Use a timer or remote, keep hands off |
| Image drifts during a long exposure | Loose lock or soft ground | Retighten, press the feet in, spread the legs |
| Blur on windy days | Tall setup and raised center column | Lower the setup and add weight |
| Front-heavy camera sags | Poor balance with a long lens | Mount by the lens collar, rebalance |
| Soft focus on a still subject | Missed focus, not shake | Use live view zoom and manual focus |
| Camera twists on the plate | Loose mounting screw | Tighten and use an anti-twist plate |
Before You Start: Setup Checklist
- Pick firm ground, then spread the legs and press each foot in.
- Use thick leg sections first and keep the center column low.
- Level the platform by adjusting the legs, not by tilting the head.
- Attach the plate securely and balance the camera before letting go.
- Set a low ISO, turn off stabilization if the manual advises it and focus carefully.
- Use a remote release or a timer, and keep your hands off during the exposure.
Related guides
- How To Take Sharp Handheld Photos In Low Light
- How To Edit Photos In Lightroom As A Beginner
- How To Clean A Camera Sensor Safely At Home
Frequently Asked Questions
Should I turn off image stabilization on a tripod?
Often yes, though it depends on the camera and lens. Check the manual, because some modern systems detect a tripod and handle it automatically.
Why are my tripod photos still blurry?
The usual causes are vibration from pressing the shutter, a raised center column, a loose lock or missed focus. Work through each one, starting with a timer or remote release.
Is a heavier tripod always steadier?
Heavier tripods resist wind and vibration better, but good technique and a low setup can matter just as much. Choose one you will actually carry.
Can I use a tripod for handheld-style shooting?
You can use it as a support for moving subjects, but loosen the head so you can pan smoothly. For sharp still frames, lock everything down and use a timer.
More from Amazon
Programs that pair well with the guide above. Offers and eligibility are set by Amazon and may change.
Free shipping on eligible items, Prime Video and more. Eligible new members can start with a free trial.
Start a Prime free trialAudiobooks and podcasts to listen to on the go. Eligible new members can start with a free trial.
Try Audible freeAd-free music streaming. Eligible new subscribers can start with a free trial.
Try Music Unlimited freeA free business account with business pricing and bulk-buying tools for work, shop or home office.
Create a business accountAs an Amazon Associate we earn from qualifying purchases.