Key takeaways
- To get sharp handheld photos in low light, keep your shutter speed fast enough to freeze both your own movement and your subject's.
To get sharp handheld photos in low light, keep your shutter speed fast enough to freeze both your own movement and your subject’s, raise ISO before you accept blur, and brace your body so the camera barely moves during exposure. Everything else, from lens choice to editing, is a way of buying yourself a little more light or a little more stability.
Dim restaurants, evening streets, indoor events and dusk walks all ask the same question: how slow can the shutter go before the picture softens? This guide walks through the settings, the stance and the small habits that decide the answer, so you can leave the tripod at home in 2026 and still come back with frames you are happy to enlarge.
Why Low-Light Photos Turn Soft
Two different problems look alike in a dark scene. Camera shake is your own motion during the exposure, which blurs the whole frame evenly. Subject motion blurs only the person or object that moved, while the background stays crisp. Telling them apart tells you what to fix: shake calls for better support or a faster shutter, and subject blur calls for a faster shutter specifically.
A long-standing starting rule says the slowest safe handheld shutter speed is about one over your focal length, so a 50mm lens needs roughly 1/50 of a second. Treat it as a rough guide. Steady hands, image stabilization and a light camera body can stretch it, while a high-resolution sensor, a long lens or a tired arm shrinks it. Low light pushes you toward slower shutters, which is why every setting below is about recovering speed.
Set Up the Camera for Speed
Start with shutter speed
Choose shutter priority or manual mode and set the speed first, since it controls blur more than any other setting. For still subjects, begin near the reciprocal of your focal length. For people who are talking, walking or dancing, move to 1/125 of a second or faster. Check the screen after a few frames and zoom into the eyes to see whether the speed is enough.
Raise ISO before you accept blur
A noisy sharp photo is nearly always more useful than a clean blurry one. Raise ISO until the shutter speed is safe, then stop. Modern sensors handle higher ISO values better than older ones, and noise reduction tools in editing software have improved a great deal. Auto ISO with a minimum shutter speed set is a convenient way to let the camera do this while you concentrate on framing.
Open the aperture, but not all the way
A wider aperture lets in more light and allows a faster shutter, but the focus zone becomes very thin. At the widest setting, a lens may also be a little softer than one stop smaller. Try stopping down slightly if the subject is a face or a still object, and use the widest setting only when the light is truly poor.
Choose focus and stabilization settings wisely
Single-point autofocus on a high-contrast edge works better in dim scenes than a wide area mode. If the camera hunts, focus on a bright edge or a light source at the same distance, then recompose. Turn on lens or sensor stabilization if you have it, though many cameras suggest turning it off on a tripod. Stabilization helps with shake but does nothing for a moving subject.
Hold the Camera Like a Tripod
Technique is free and it often adds two or three stops of usable shutter speed. Plant your feet shoulder-width apart with one foot slightly forward, tuck both elbows against your ribs, and cradle the lens from underneath with your left hand rather than gripping it from the side. If you shoot with the screen, bring the camera in close and let your arms form a triangle with your chest. If you have a viewfinder, press your brow against it, because the third point of contact adds stability.
Breathing matters more than most people expect. Take a breath, let half of it out, hold still and squeeze the shutter button gently instead of stabbing it. Pressing through the shot rather than at the shot reduces the jolt at the moment of exposure. Many photographers also fire a short burst of three frames and keep the sharpest one, since movement is never identical from frame to frame.
Borrow Stability From the Scene
Almost every environment has something you can lean on. Rest your elbows on a table or a counter, press your shoulder against a doorframe, or brace the camera on a wall or a railing. A folded jacket or a small bag makes a decent cushion for the camera on a hard surface. Sitting down and propping your elbows on your knees is another trick that works on almost any bench or curb.
Use the self-timer or a two-second delay when the camera is resting on something. The delay lets vibrations from your finger die away before the exposure starts. This is a simple way to get one extra stop or two of sharpness without carrying extra gear, and it works well for still scenes like buildings, food and interiors.
Match the Settings to the Scene
A candlelit dinner, a city street at dusk and a dim living room each reward a slightly different approach. At the table, people hold still between bites, so you can wait for a pause and shoot at a slower speed. On the street, walkers and traffic move, so favor speed and accept grain. Indoors, look for the brightest part of the room, such as a window or a lamp, and place your subject near it so the camera needs less ISO to begin with. Light direction matters too: a soft side light gives shape without forcing you to open the aperture all the way.
Quick Troubleshooting Table
| Problem you see | Likely cause | What to change |
|---|---|---|
| Whole frame looks smeared | Camera shake | Raise shutter speed, brace your body, use a delay |
| Subject blurred, background sharp | Subject motion | Use a faster shutter, wait for pauses between movements |
| Only part of the face is sharp | Aperture too wide or missed focus | Stop down slightly, refocus on the eyes |
| Grainy shadows and color specks | High ISO | Accept some noise, expose well, reduce noise in editing |
| Camera will not lock focus | Too little contrast | Focus on a bright edge or light source |
| Dark, muddy image | Underexposure | Raise ISO or open aperture rather than lightening a dark file |
Before You Start: Low-Light Checklist
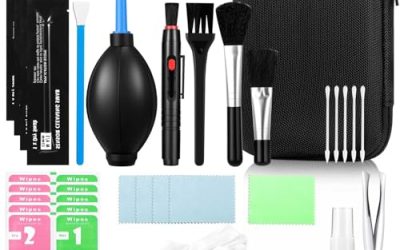
- Clean the lens and viewfinder, because smudges look like softness in dim light.
- Set a minimum shutter speed in auto ISO if your camera allows it.
- Switch to a raw format so you have more room to recover shadows and reduce noise.
- Turn on stabilization and check that the focus mode suits a single still subject.
- Find a wall, railing or table to lean on before you raise the camera.
- Take a short burst for important frames and keep the sharpest.
Cleaning Up the Result
Do not expect every frame to be perfect at full size. Zoom to 100 percent on the eyes or the main detail and judge sharpness there, not on the small screen. Use moderate noise reduction on shadows and avoid pushing it so far that skin looks waxy. A touch of sharpening after noise reduction usually restores crispness. If a picture is slightly soft, a smaller print or a social media crop will often hide it, so choose the right output for the shot.
Related guides
- How To Use A Tripod Properly For Sharper Photos
- How To Edit Photos In Lightroom As A Beginner
- How To Clean A Camera Sensor Safely At Home
Frequently Asked Questions
What shutter speed should I use for handheld low-light photos?
Start near one over your focal length for still subjects and move to 1/125 of a second or faster for people. Adjust after reviewing a test frame, since steady hands and stabilization can allow slower speeds.
Is high ISO better than a slow shutter?
For handheld work, usually yes. Noise can be reduced in editing, while motion blur cannot be undone. Raise ISO until the shutter speed is safe, then stop.
Does image stabilization replace good technique?
No. Stabilization reduces shake but cannot stop a moving subject, and it has limits. Good stance and a gentle shutter press still make a difference.
Should I use flash instead?
Flash can freeze motion and add light, but it changes the mood of a scene and may not be allowed in some venues. Try available light first, and use flash when the picture needs it.
More from Amazon
Programs that pair well with the guide above. Offers and eligibility are set by Amazon and may change.
Free shipping on eligible items, Prime Video and more. Eligible new members can start with a free trial.
Start a Prime free trialAudiobooks and podcasts to listen to on the go. Eligible new members can start with a free trial.
Try Audible freeAd-free music streaming. Eligible new subscribers can start with a free trial.
Try Music Unlimited freeA free business account with business pricing and bulk-buying tools for work, shop or home office.
Create a business accountAs an Amazon Associate we earn from qualifying purchases.