Key takeaways
- Measure the camera kit first. Lay out the body, longest lens, additional lenses, batteries, charger, and any flash. Compare those dimensions with the usable insert dimensions—not the backpack’s advertised total volume.
- Allow room for non-camera essentials. A day hike may also require a water bottle, rain shell, food, and a first-aid kit. If the camera insert fills the entire pack, the nominal capacity is misleading for trail use.
- Try the harness with weight. Load the bag to roughly the weight you expect to carry. Adjust shoulder straps and the sternum strap; if the model has a hip belt, it should sit on your hips rather than pulling the pack down from your shoulders. A padded back panel helps, but fit and load placement matter more.
- Match access to your shooting style. Side access is handy for a camera you reach often, while full rear access can keep the harness off wet ground when the pack is opened. More openings also mean more zippers and seams to protect from weather.
- Check airline rules for your itinerary. A 30L label does not guarantee cabin acceptance. Measure the fully packed bag, including bulging pockets, and check both the airline’s carry-on dimensions and personal-item limits. Rules vary by carrier and fare.
Best Camera Backpacks for Travel and Outdoor Photography
The best camera backpacks depend on whether you need airline-friendly space, a light day-hike carry, or room for a long lens and a laptop; for one versatile starting point, compare the Peak Design Travel Backpack 30L with the Shimoda Explore V2 30L, then choose by fit and access rather than capacity alone.
Quick comparison: capacity, weight, and trade-offs
Figures below are manufacturer-listed or commonly published specifications; configurations and regional versions can differ. “Camera capacity” is not standardized, so treat it as a practical estimate: a body, several lenses, and accessories may fit differently depending on insert size and lens dimensions.
Our top picks

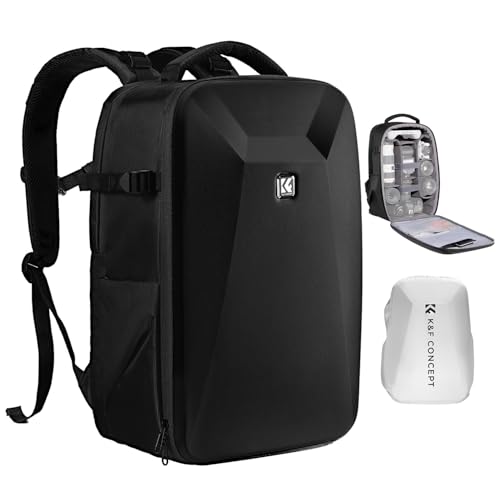
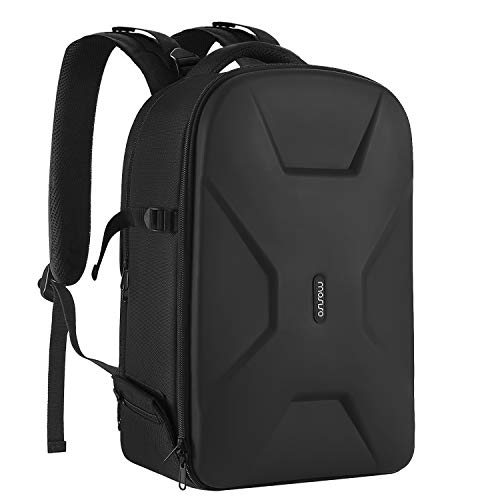

As an Amazon Associate we earn from qualifying purchases at no extra cost to you. Ratings are shown as listed on Amazon.
| Backpack | Volume | Approx. empty weight | Laptop sleeve | Best suited to |
|---|---|---|---|---|
| Peak Design Travel Backpack 30L | 27–33L, expandable | 1.44 kg / 3.17 lb | Up to 16 in | Travel-first carry with a removable camera cube |
| Shimoda Explore V2 30 | 30L | About 2.0 kg / 4.4 lb, configuration-dependent | Up to 16 in, depending on model | Hiking comfort and camera access on the move |
| Lowepro ProTactic BP 450 AW III | About 25L | About 2.8 kg / 6.2 lb | Up to 15 in | Fast access and a substantial, organized camera load |
| WANDRD PRVKE 31L | 31L, roll-top expandable | About 1.5 kg / 3.3 lb | Up to 16 in, depending on version | Urban travel with weather-resistant materials |
Weights vary with accessories, camera cubes, and product revisions. Check the exact version’s sizing before buying, especially if you plan to carry a larger laptop.
Choose by the trip, not just the liter count
For flights and mixed-purpose travel: Peak Design Travel Backpack 30L
The Travel Backpack 30L is a strong choice when a bag must switch between camera transport and general luggage. Its clamshell opening makes packing clothes and camera gear straightforward, and the expandable volume gives some flexibility for a return trip. Add a compatible camera cube to protect equipment; without one, the main compartment is not a padded camera bay.
Its trade-off is hiking ergonomics. The harness is capable for travel, but a cube, laptop, water, and clothing can make the load dense against your back. For a full day on uneven trails, a pack designed around camera access and a supportive harness may carry better.
For day hikes and changing conditions: Shimoda Explore V2 30
The Explore V2 prioritizes a supportive carry and camera access while walking. Shimoda’s removable Core Unit system lets you size the padded compartment to your camera kit, leaving space for layers, food, and other trail essentials. Check torso and shoulder-strap fit carefully: the right volume will not compensate for a harness that does not match your body.
It is heavier than a minimal travel pack before gear goes in. That extra structure can help distribute a substantial load, but is unnecessary if you carry only a small mirrorless kit and a few personal items.
For frequent lens changes and quick access: Lowepro ProTactic BP 450 AW III
The ProTactic BP 450 AW III is built around organized camera storage and multiple ways to reach the equipment. Side and top access can reduce the need to set the bag down when changing lenses or responding to a moment. Its structured layout is useful for photographers carrying several bodies or lenses, but the pack’s own weight takes a larger share of your total carry allowance.
That matters on flights and hikes alike: weigh the loaded bag, not just the empty one. A heavy pack with a full camera kit can become tiring before the day’s walking is done.
For city travel with rain exposure: WANDRD PRVKE 31L
The PRVKE combines a roll-top opening, laptop storage, and side camera access when paired with a camera cube. Its weather-resistant construction is useful for showers and splashes, but weather-resistant is not the same as waterproof. Use a rain cover or dry bags for prolonged rain, wet trails, or gear that cannot tolerate moisture.
How to decide: fit, access, and carry comfort
- Measure the camera kit first. Lay out the body, longest lens, additional lenses, batteries, charger, and any flash. Compare those dimensions with the usable insert dimensions—not the backpack’s advertised total volume.
- Allow room for non-camera essentials. A day hike may also require a water bottle, rain shell, food, and a first-aid kit. If the camera insert fills the entire pack, the nominal capacity is misleading for trail use.
- Try the harness with weight. Load the bag to roughly the weight you expect to carry. Adjust shoulder straps and the sternum strap; if the model has a hip belt, it should sit on your hips rather than pulling the pack down from your shoulders. A padded back panel helps, but fit and load placement matter more.
- Match access to your shooting style. Side access is handy for a camera you reach often, while full rear access can keep the harness off wet ground when the pack is opened. More openings also mean more zippers and seams to protect from weather.
- Check airline rules for your itinerary. A 30L label does not guarantee cabin acceptance. Measure the fully packed bag, including bulging pockets, and check both the airline’s carry-on dimensions and personal-item limits. Rules vary by carrier and fare.
Which type is right for you?
| Your situation | What to prioritize | Shortlist |
|---|---|---|
| Mostly city trips; camera comes out occasionally | Flexible main compartment, laptop protection, removable insert | Peak Design Travel Backpack 30L or WANDRD PRVKE 31L |
| Regular day hikes with a camera and layers | Harness fit, load stability, water access, a correctly sized camera unit | Shimoda Explore V2 30 |
| Several lenses and frequent camera changes | Organized padded space, quick access, manageable loaded weight | Lowepro ProTactic BP 450 AW III |
| First camera backpack or occasional use | Moderate cost, simple insert, room for everyday items | Compare a smaller camera backpack or a general travel pack with a padded insert |
As a broad market guide, camera backpacks range from roughly $100–$200 for simpler or smaller designs to about $200–$400 or more for structured, feature-rich models. Camera cubes may cost extra. A smaller bag that fits your usual kit can be a better purchase than a larger premium pack you routinely overfill.
Ownership details that affect long-term value
Zippers, seams, and high-friction areas—especially the base and shoulder-strap attachment points—take the most wear. Dirt trapped in zipper teeth can make them harder to operate, while carrying a laptop and camera gear in the same bag increases both weight and the consequences of a spill. Keep wet clothing separate from electronics, and use an internal dry bag if the forecast is poor.
After a dusty or muddy trip, empty the bag and brush or wipe away grit before it reaches zippers and hook-and-loop dividers. Let damp padding dry fully with compartments open; avoid storing the pack wet. Inspect straps, buckles, and stitching periodically, and replace worn dividers or accessory straps before they fail under load.
In short: choose the Peak Design for adaptable travel, the Shimoda for hiking-oriented comfort, the Lowepro for organized access, and the WANDRD for a flexible urban carry with weather-resistant construction. Before settling on any of them, confirm that the camera insert fits your actual gear, the harness fits your body, and the packed dimensions suit your airline.