Key takeaways
- Measure the camera body with its largest routinely mounted lens, including the viewfinder and grip.
- Measure the longest lens with its hood in the carrying position you prefer.
- Compare those dimensions with the bag’s internal compartment dimensions, leaving room for dividers and easy removal.
- Lay out the body, lenses, batteries, and accessories together. Make sure the arrangement protects the lens from pressure and does not force the zipper closed against the gear.
Best camera bags: choose by kit weight, access, and where you carry it
The best camera bags depend on how you move: choose a padded shoulder bag for a compact kit and quick lens changes, a sling for a light setup on foot, a messenger for a camera plus everyday items, or a rolling case for heavy gear and smooth routes. Before buying, check the bag’s usable interior dimensions against your longest lens, then compare padding, rain protection, access, and how the loaded bag will feel after an hour.
The figures below are representative ranges for common designs, not specifications for every model. Brands such as Peak Design, Think Tank Photo, Lowepro, and Domke offer bags in several sizes; verify the exact model’s dimensions and capacity before ordering.
Our top picks

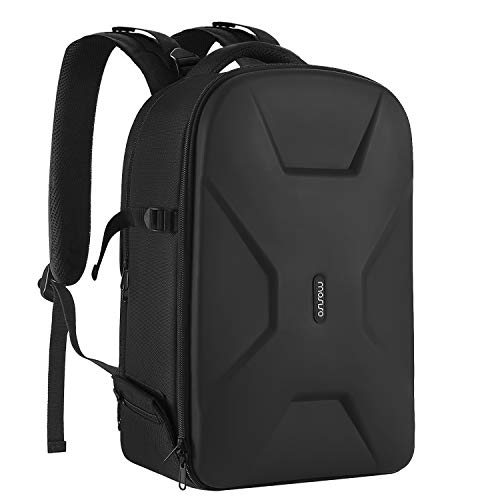
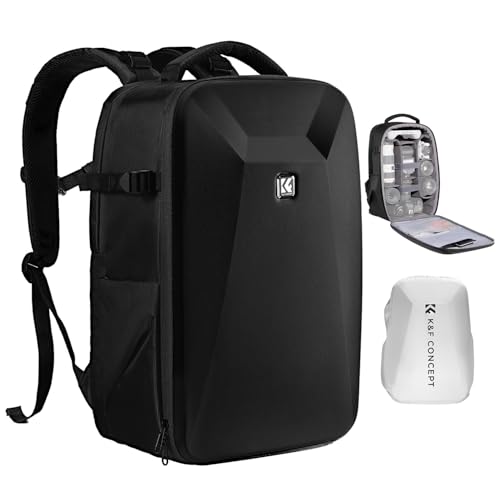

As an Amazon Associate we earn from qualifying purchases at no extra cost to you. Ratings are shown as listed on Amazon.
| Design | Typical usable capacity | Typical empty weight | Padding and weather protection | Access and comfort |
|---|---|---|---|---|
| Shoulder bag | 6–15 L; body plus 2–4 lenses | 0.5–1.2 kg | Movable padded dividers; often a water-resistant outer fabric, but rain cover varies | Fast top access; weight stays on one shoulder |
| Sling | 4–10 L; body plus 1–3 lenses | 0.4–1.0 kg | Moderate padding; zipper flaps and coated fabric vary by model | Fast swivel-to-front access; comfortable when lightly loaded |
| Messenger | 10–20 L; camera kit plus tablet or daily items | 0.7–1.5 kg | Often a padded camera insert inside a larger compartment; weather protection is model-dependent | Good access under a flap; broad strap helps, but mixed loads can shift |
| Rolling case | 20–40 L; multiple bodies and lenses | 3–6 kg | Usually the most substantial structure and padding; rain covers and sealed seams are not universal | Easy on smooth floors; cumbersome on stairs, rough ground, and crowded transit |
Pick the format that fits your day
Shoulder bag: best for a small kit and frequent lens changes
A shoulder bag suits photographers who want to reach a camera without taking the bag off. Its wide opening makes it easy to see lenses and accessories, and removable dividers let you reconfigure the interior. It works well for a mirrorless body with two or three lenses, or a compact DSLR kit.
The trade-off is uneven load. A fully packed shoulder bag can pull on one shoulder, especially during a long walk. Keep heavy items close to your body and avoid choosing capacity based on the biggest kit you might carry once a year. A bag with room for one extra lens is often more comfortable than a large, half-filled bag that shifts around.
Sling: best for walking with one camera ready
A sling is a good choice for a light, focused setup: one body, a mounted lens, perhaps one spare lens, and small essentials. The strap lets you rotate the bag from your back to your front for access without setting it down. That makes it convenient for city walks and short outings where speed matters more than carrying a complete kit.
Its smaller interior can become awkward with a long telephoto lens, a large camera body, or extra personal items. Check the length and depth of the camera compartment, not just its stated litre capacity. For extended wear, look for a strap that distributes weight across a broad area and can be adjusted securely.
Messenger: best when camera gear shares space with everyday carry
A messenger combines camera storage with room for a tablet, notebook, water bottle, or jacket. Some models use a dedicated padded camera compartment; others rely on a removable insert. The latter can make the bag more versatile, but the insert’s actual dimensions determine whether your camera fits safely.
A flap can help shield zippers from light rain, but it does not make a bag waterproof. With a camera kit and work items together, the load can get heavy and lopsided. Pack the camera insert low and close to your back, and use a stabilizing strap if the bag offers one.
Rolling case: best for transporting a large kit between smooth locations
Wheels are valuable when you regularly move multiple bodies, lenses, flashes, or video accessories through airports and studios. A rigid or heavily padded case can keep equipment organized and reduce the strain of carrying the full load on your back.
Rolling bags are the least convenient option on stairs, gravel, narrow sidewalks, and crowded buses. Their empty weight also counts toward airline baggage limits, and a case that fits overhead on one aircraft may not fit another. Confirm current carrier rules and the packed external dimensions before a trip; do not assume a camera bag is automatically approved as carry-on luggage.
Match the bag to your camera kit, not its litre rating
Capacity labels are useful for comparing broad categories, but they do not guarantee a particular camera will fit. Interior shapes, divider thickness, and compartments for accessories all take up space. For a reliable fit check:
- Measure the camera body with its largest routinely mounted lens, including the viewfinder and grip.
- Measure the longest lens with its hood in the carrying position you prefer.
- Compare those dimensions with the bag’s internal compartment dimensions, leaving room for dividers and easy removal.
- Lay out the body, lenses, batteries, and accessories together. Make sure the arrangement protects the lens from pressure and does not force the zipper closed against the gear.
For a compact mirrorless kit, a 4–8 L sling or shoulder bag may be enough. A body with three lenses and a flash often calls for roughly 8–15 L, depending on lens size. A larger DSLR or telephoto kit may need a deep shoulder bag, a roomy messenger with an insert, or a rolling case. These are starting points, not fit guarantees.
Compare protection and access realistically
Padding protects against bumps, but no soft bag should be treated as a hard case. Look for a padded base, dividers that hold their shape, and enough structure to stop equipment being crushed when the bag is set down. Keep camera bodies and lenses from touching directly, and store a lens with caps on when it is not mounted.
Weather resistance is a combination of fabric, seams, zippers, and flap design. “Water-resistant” usually means protection from splashes or brief light rain, not prolonged exposure or submersion. If the bag will be used in sustained rain, choose a model with a fitted rain cover or carry a separate cover. A cover is also worth considering for a costly kit, even when the bag has a water-repellent coating.
Access speed has a cost: large top openings and quick-release flaps are convenient, but can offer less security in a crowded place. For travel or busy streets, choose closures that can be secured, keep valuables toward your body, and avoid leaving a camera protruding from an open bag.
Choose by use frequency and carrying conditions
| Your situation | Practical choice | Why |
|---|---|---|
| Occasional outings; one body and one lens | Small shoulder bag or sling | Lower cost and less bulk; prioritize a secure divider and comfortable strap over unused capacity. |
| Daily walks; camera comes out often | Sling or compact shoulder bag | Fast access matters, but keep the kit light enough to carry comfortably for the whole outing. |
| Camera plus tablet, lunch, or work items | Messenger with a fitted camera compartment | Separate zones make mixed-use carrying easier; check how the bag feels when both sections are loaded. |
| Several lenses or a telephoto used regularly | Large shoulder bag, structured messenger, or rolling case | Choose by lens length and total loaded weight; wheels help only when the route is accessible. |
| Frequent rain or outdoor work | Any suitable format with a rain cover and covered closures | Extra rain protection is more dependable than relying on fabric treatment alone. |
Price varies widely with materials, construction, and size. As a broad market guide, basic soft camera bags may cost around $30–$80, more structured slings and shoulder bags about $60–$200, and premium or larger travel designs roughly $150–$400 or more. Compare a bag’s construction and fit at the price you can justify; a high price does not guarantee that its layout suits your kit.
Ownership details that affect long-term value
Straps, zipper pulls, hook-and-loop closures, and wheel assemblies are common wear points. Hook-and-loop can collect lint and lose its grip; brush debris out rather than pulling at it with sharp tools. Keep zippers free of grit, and avoid forcing them around overpacked corners. On rolling cases, inspect wheels and handles after travel, since rough surfaces and impacts can loosen or damage them.
Clean dusty interiors with a soft brush or vacuum using a low setting, and wipe the exterior according to the manufacturer’s care instructions. Let a damp bag dry fully before storing it to limit odors and mildew. Do not leave batteries, memory cards, or camera gear in a hot parked car; heat can affect electronics and batteries, while pressure from other luggage can damage equipment inside even a padded bag.
The best camera bags are the ones that fit the actual kit, stay comfortable at its real loaded weight, and make access easy without compromising protection. Choose a sling or shoulder bag for light, frequent access; a messenger for camera-and-everyday carry; and a rolling case when the gear is heavy and the route is mostly smooth.