Key takeaways
- To shoot in manual mode as a beginner, set ISO for the light you have, choose an aperture for the look you want.
To shoot in manual mode as a beginner, set ISO for the light you have, choose an aperture for the look you want, pick a shutter speed that freezes the motion, and then nudge those three until the exposure meter reads balanced. Manual mode sounds intimidating, but it is only three dials working together, and each one has a single job.
The camera’s automatic modes make guesses about what you care about, and they guess wrong in backlit portraits, night scenes and anything with a bright sky. Taking control means you decide how blurry the background is and how sharp the movement looks. This guide breaks manual mode into a routine you can run in a few seconds, with practice exercises to build speed, and it applies to any interchangeable-lens camera sold in 2026 or earlier.
Understand the Exposure Triangle
Exposure is the amount of light that reaches the sensor, and three settings control it. Aperture sets how wide the lens opens, shutter speed sets how long the sensor sees light, and ISO sets how sensitive the sensor is. Change one and you must adjust another to keep the picture looking balanced, which is why beginners find it hard at first.
Each setting also changes the look of the photo. A wide aperture blurs the background, a fast shutter freezes motion, and a high ISO adds visible noise. Manual mode is about choosing which of those trade-offs matters in the moment.
The Three Settings in Practice
Aperture: depth and light
Low f-numbers such as f/1.8 or f/2.8 open the lens wide, letting in more light and giving a shallow depth of field with a soft background. Higher numbers such as f/8 or f/11 sharpen more of the scene, useful for landscapes and groups. Start with a wide aperture for portraits and a mid-range one for everything else.
Shutter speed: freezing or blurring motion
Fast speeds like 1/500 second stop running children and birds, while slow speeds like 1/30 second or longer blur motion and need a tripod. A common handheld rule is to use a speed at least as fast as the inverse of your focal length, so around 1/60 for a 50 mm lens, though stabilization can help.
ISO: your light safety net
Use the lowest ISO that still lets you reach your aperture and shutter choices, such as the base setting outdoors. Raise it in dim places, accepting more noise rather than a blurry shot. Modern cameras handle higher ISO better than older ones, so do not be afraid to raise it when needed.
Read the exposure meter
The meter inside your viewfinder or screen shows a scale with a zero in the middle. Adjust settings until the marker sits near zero, then check the photo and histogram. Move the marker slightly positive for dark scenes and negative for bright ones, since meters aim for midtone gray.
A Simple Routine
| Step | What to set | Question to ask |
|---|---|---|
| 1 | ISO | How bright is the light here? |
| 2 | Aperture | How much of the scene should be sharp? |
| 3 | Shutter speed | Is the subject moving, or am I? |
| 4 | Meter and review | Is the exposure near zero and the histogram healthy? |
| 5 | Adjust | Which setting can I change without hurting the look? |
Practice Exercises
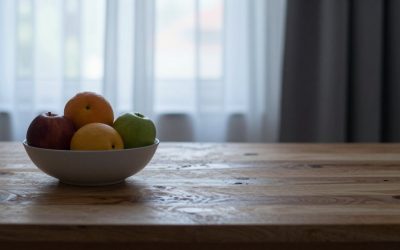
Pick one subject, such as a plant on a table, and shoot it at several apertures while keeping exposure balanced by changing shutter speed. Compare how the background blur changes. Next, photograph a moving subject such as a walking friend at 1/60, 1/250 and 1/1000 second and see which freezes the motion.
Spend a week in aperture priority first if full manual feels like too much. It lets you choose aperture while the camera sets shutter speed, which teaches the same relationships with fewer moving parts. Then switch to manual on a calm day and work up to action.
Before You Switch to Manual
- Learn where each dial is without looking.
- Turn on the live histogram or exposure preview if available.
- Start in steady light, like a shaded porch or an overcast day.
- Set a maximum ISO you are comfortable with.
- Shoot RAW to give yourself room to correct mistakes.
- Review every few shots and adjust.
Starting Settings for Common Scenes
Portrait in soft daylight
Try a wide aperture such as f/2.8, a shutter speed around 1/250 second to avoid blur from small movements and the lowest ISO that keeps the meter near zero. Focus on the nearest eye. If the background looks too busy, move your subject farther from it or step closer.
Kids and pets in motion
Move the shutter speed up first, around 1/500 second or faster, then open the aperture and raise ISO until the exposure balances. Switch to continuous focus if your camera offers it so the subject stays sharp as it moves.
Landscape in bright sun
Choose a mid-range aperture around f/8 to f/11, a low ISO and let the shutter speed fall where it needs to. If the speed is slow, brace the camera on a wall or tripod. Check the sky on the histogram to avoid washing out clouds.
Indoors in dim light
Open the aperture wide, accept a higher ISO and use the slowest shutter speed that still freezes the subject. If a face looks blurry, the shutter is too slow; if the picture looks grainy, you may need to move closer to a window or add light.
Troubleshooting Blur and Noise
Blurry photos usually come from one of three causes: a shutter speed too slow for camera shake, a shutter speed too slow for subject motion, or missed focus. Look at the image zoomed in: if everything is soft, it is shake; if only the moving subject is soft, raise the shutter speed; if the background is sharp and the subject is not, adjust the focus point.
Grain and noise grow with ISO and with underexposure that you later brighten. If a high ISO photo looks rough, try a wider aperture or a slower shutter with more support before you give up. Remember that a slightly noisy sharp picture usually looks better than a clean blurry one.
Moving From Auto to Manual Gradually
Few people switch to full manual overnight. Begin in aperture priority to learn depth of field, then try shutter priority for motion. Next, use manual with auto ISO so the camera helps with light while you choose the creative settings. Eventually lock ISO yourself in steady light.
Keep a simple notebook or use your photo software to review the settings behind your best and worst shots. Patterns appear quickly: you may notice you always choose too slow a shutter indoors or too narrow an aperture for portraits. Each correction makes the next outing smoother, and after a few weeks the dials start to feel automatic.
Build Speed With Daily Practice
Manual mode becomes quick only when your fingers know the dials. Spend ten minutes a day with the camera in your hands, changing aperture, shutter speed and ISO while watching the meter move, even without taking a photo. Say out loud what each change will do before you make it, then confirm it on the screen.
When you head out to shoot, start every session with a test frame of a representative part of the scene, check it, and adjust before the real moment arrives. If the light changes, repeat the check. That small habit saves more missed shots than any piece of equipment.
Related guides
- How To Use A Tripod Properly For Sharper Photos
- How To Take Sharp Handheld Photos In Low Light
- How To Edit Photos In Lightroom As A Beginner
Frequently Asked Questions
Is manual mode better than automatic?
It is more controllable, not automatically better. Manual helps in tricky light or when you want a specific look; auto is fine for fast, simple shots.
Which setting should I change first?
Choose the one that serves your creative goal: aperture for background blur or shutter speed for motion, then use ISO to finish the exposure.
What if my photos look too dark or bright?
Check the meter and histogram, then adjust shutter speed or aperture. Small changes of one stop are usually enough.
Can I use auto ISO in manual mode?
Yes. Many photographers lock aperture and shutter speed and let auto ISO handle changing light, which is a good bridge for beginners.
More from Amazon
Programs that pair well with the guide above. Offers and eligibility are set by Amazon and may change.
Free shipping on eligible items, Prime Video and more. Eligible new members can start with a free trial.
Start a Prime free trialAudiobooks and podcasts to listen to on the go. Eligible new members can start with a free trial.
Try Audible freeAd-free music streaming. Eligible new subscribers can start with a free trial.
Try Music Unlimited freeA free business account with business pricing and bulk-buying tools for work, shop or home office.
Create a business accountAs an Amazon Associate we earn from qualifying purchases.