Key takeaways
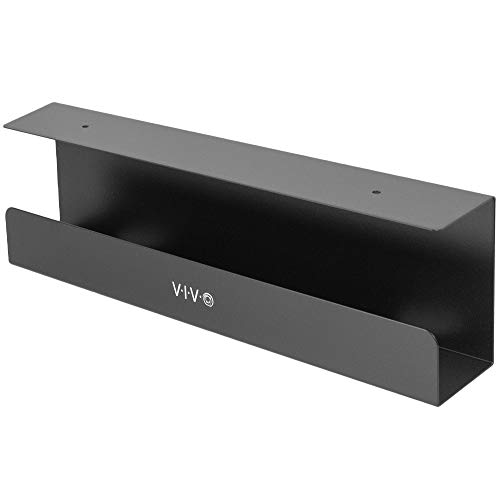
- Best for a stable, long-term setup: A screw-mounted steel tray, such as the IKEA SIGNUM cable management tray. It keeps cables and a power strip off the floor, but its fixed mounting points and open design require a desk that can accept screws.
- Best for renters or desks you can’t drill: A clamp-on under-desk cable tray. It can be repositioned or removed, though clamps need a reasonably straight, accessible desk edge and enough clearance beneath it.
- Best for bulky adapters and power bricks: A deep, open-wire under-desk basket or rack. Its height and access make it easier to fit oversized adapters and route cables, at the cost of a more visible installation.
- Best for a clean-looking finish: A covered under-desk tray or cable-management box mounted below the desktop. Covers conceal clutter well but can make heat buildup and later changes more troublesome.
The best desk cable management trays for most setups are a wide, screw-mounted steel tray for a permanent desk, a clamp-on basket for a desk you can’t drill, and a deeper under-desk rack if you need to hide bulky power bricks. Choose by measuring the usable space under your desk and checking the tray’s load limit—not just its advertised width.
Our top picks



As an Amazon Associate we earn from qualifying purchases at no extra cost to you. Ratings are shown as listed on Amazon.
Best desk cable management trays by situation
- Best for a stable, long-term setup: A screw-mounted steel tray, such as the IKEA SIGNUM cable management tray. It keeps cables and a power strip off the floor, but its fixed mounting points and open design require a desk that can accept screws.
- Best for renters or desks you can’t drill: A clamp-on under-desk cable tray. It can be repositioned or removed, though clamps need a reasonably straight, accessible desk edge and enough clearance beneath it.
- Best for bulky adapters and power bricks: A deep, open-wire under-desk basket or rack. Its height and access make it easier to fit oversized adapters and route cables, at the cost of a more visible installation.
- Best for a clean-looking finish: A covered under-desk tray or cable-management box mounted below the desktop. Covers conceal clutter well but can make heat buildup and later changes more troublesome.
These are categories rather than interchangeable models: dimensions, clamp ranges, and load limits vary between products, even within one category. Treat the comparison below as a starting point, then confirm the specifications for the exact tray you’re considering.
Compare the tray types before you buy
The figures below are practical sizing targets, not specifications for every product in a category. Use the product’s own measurements and rated load for a final fit check.
| Tray type | Useful length | Useful depth | Practical load target | Mounting and access | Best for |
|---|---|---|---|---|---|
| Screw-mounted steel tray | About 50–60 cm | About 10–15 cm | At least 5 kg, subject to the maker’s rating | Fixed; usually easy to reach from below | Power strip, cable slack, and smaller adapters |
| Clamp-on wire basket | About 40–60 cm | About 12–18 cm | At least 5 kg, subject to clamp and tray ratings | No drilling; usually removable | Rented spaces and desks that cannot be drilled |
| Deep under-desk rack | About 40–60 cm | About 15–20 cm | At least 7 kg, subject to the maker’s rating | Open access; may need screws or heavy-duty clamps | Several large power bricks or a bulky power strip |
| Covered tray or box | About 30–50 cm | About 12–18 cm | At least 3 kg, subject to the maker’s rating | Clean appearance; slower to inspect and rework | Hiding a compact bundle in a visible room |
Load figures need context. A tray’s published limit may assume correct installation into a suitable surface. A clamp, thin desktop, hollow-core panel, or poorly placed screw can become the weak point. Add up the weight of the power strip, adapters, and accessories, leave some margin, and follow the manufacturer’s mounting guidance.
How to check fit, capacity, and power-brick clearance
- Measure the usable mounting area. Check the clear width between desk legs, support rails, and drawers—not the full desktop width. Measure depth too, especially if your desk has a crossbar or sits close to a wall.
- Measure the items that must go inside. Include the power strip, the largest adapter, plugs, and cable bends. An adapter’s body may fit while its plug or cable needs extra room to exit.
- Allow space for access. Leave roughly 2–3 cm of clearance around bulky plugs and enough open space to remove an adapter without dismantling the whole bundle. This is a practical allowance, not a substitute for the tray’s dimensions.
- Check the mounting method against the desk. For a screw-mounted tray, confirm the desktop material and thickness are suitable. For clamps, compare the desk-edge thickness with the clamp’s specified range, and check for an apron, lip, or frame that could obstruct it.
- Verify the load rating and cable route. Keep the tray within its stated limit, and make sure cables can reach it without being pulled tight when the desk moves or the chair rolls back.
Worked sizing example: Suppose the open space between your desk supports is 72 cm, but you want about 5 cm clear at each end. Your maximum useful tray length is 72 − 5 − 5 = 62 cm. If the power strip and adapters together weigh 3.5 kg, a tray rated for 5 kg offers a more sensible margin than one rated right at 3.5 kg—provided the desk and mounting hardware can also support the load.
Which mounting style makes sense?
Screw-mounted trays: steady, but less forgiving
Screws suit a fixed setup and can hold a tray firmly when installed into an appropriate desktop. Before drilling, check for drawers, rails, or other obstructions and confirm that screws won’t break through the surface. If your desktop is thin, hollow, or made from a material the manufacturer excludes, choose another mounting method rather than assuming the tray’s load rating will compensate.
Clamp-on trays: flexible, with edge-clearance limits
Clamps avoid drilling and are convenient when you expect to move or change the setup. Their fit depends on desk-edge thickness, underside clearance, and clamp design. Tighten them as directed and recheck them after rearranging cables; don’t overtighten against a fragile edge. On desks with a deep apron or metal frame, a clamp may not reach the desktop at all.
Adhesive and covered options: tidy, but plan for maintenance
Adhesive-mounted trays can work for lightweight bundles on compatible, clean surfaces, but they are less reassuring for heavy power bricks. Heat, dust, surface texture, and repeated cable tugging can weaken the bond. Covered systems hide clutter effectively, yet they can trap heat or make it harder to spot a loose connection. Don’t enclose equipment unless its maker allows that installation and the enclosure provides adequate ventilation.
Make the tray easier to live with
Put the power strip where you can reach its switch and connections, then place the heaviest adapters near the tray’s mounting points rather than at an unsupported end. Group cables by destination with reusable hook-and-loop ties, and label both ends of cables that are hard to identify. Keep excess length in loose loops; tightly cinched bundles are harder to alter and can put strain on connectors.
For sit-stand desks, raise and lower the desktop slowly during setup while watching the cable path. Leave a controlled slack loop between the moving desk and fixed wall outlets or equipment. A tray can hide cables, but it cannot prevent a cord from snagging on a frame or reaching its limit of travel.
Dust the tray and check its fasteners periodically, especially after adding equipment. The parts most likely to cause trouble are often not the metal basket itself, but a loosened clamp, a strained adhesive pad, a cable tie pulled too tight, or a plug that is difficult to reach. Revisit the layout whenever you change a monitor, dock, or power brick.
Quick decision guide
- Choose screw mounting if the desk is yours, its underside is suitable, and you want a stable setup that stays in place.
- Choose clamps if you need a removable solution and your desk edge meets the clamp’s fit requirements.
- Choose a deeper open rack if the main problem is large adapters, a long power strip, or frequent cable changes.
- Choose a covered option if appearance matters most and the equipment can remain ventilated and accessible.
- Skip a tray that barely fits if it blocks a desk frame, leaves no room for cable bends, or would sit above its load limit.
For most people, a wide steel tray or clamp-on basket with room to spare is the practical choice. The right one is the tray that fits your desk, carries the actual load safely, and leaves enough access to unplug or replace equipment without turning every change into a full cable rework.